This post may contain affiliate links. Please read my disclosure policy.
Been missing sandwiches or bread while on the AIP Diet (Autoimmune Paleo Protocol)? This easy-to-make flatbread may be the answer to your dreams!
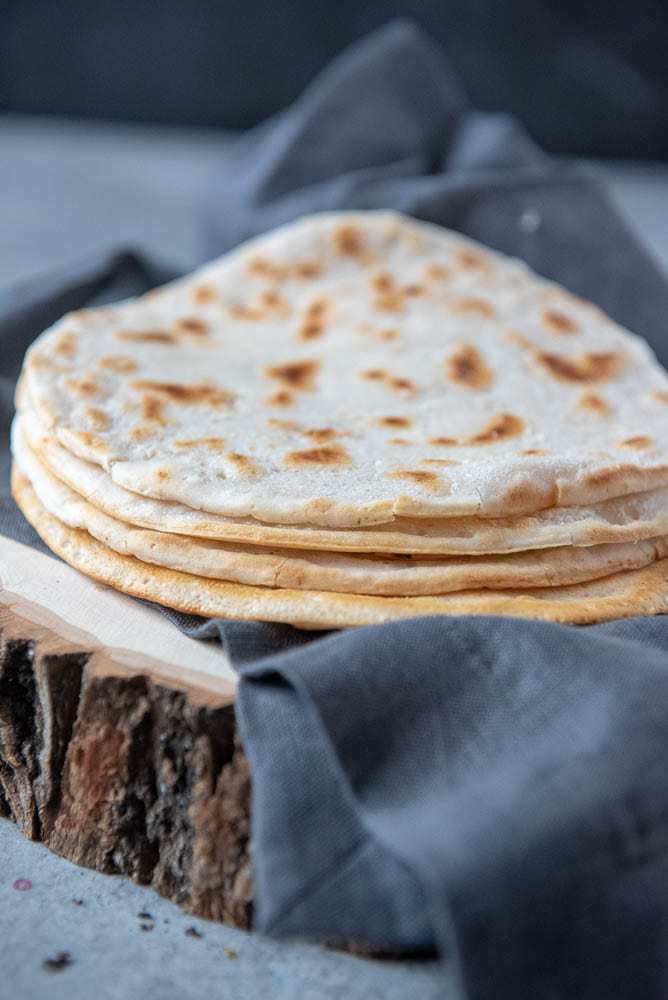
Table of contents
Life Without Bread?
There are people in this world that hear they can't have bread again, shrug and go on their merry way.
I am NOT one of them.
When I first heard I was Celiac and wouldn't be able to have glutenous, crusty french bread, pita bread, and pretty much anything else that had made up the majority of my diet my whole life, I was crushed. I mean, what was the point?
And then to make matters worse, as soon as I learned I was Celiac I went straight onto AIP. No eggs and no almond flour meant even fewer options – even my beloved Paleo muffins and quick bread were out.
Now mind you, this was back in 2014, the Dark Ages of AIP. Even pancakes were rare. Today there are MANY more options luckily.
I am a participant in the Amazon Services LLC Associates Program, an affiliate advertising program designed to provide a means for us to earn fees by linking to Amazon.com and affiliated sites.
Yet, even when I went back on AIP for a few months in 2018 I still missed some sort of way to make sandwiches. My kids were a lot older this time around and that meant we were constantly going out on adventures every weekend. Sandwiches would have just made things easier – easier to tote around, not have to have completely chilled, not need a fork and knife – the list goes on and on.
I heavily relied on Squirrel in the Kitchen's crepe recipe from her book Simple French Paleo to make simple wraps, and while they were great, I wanted something a little more substantial.
See Also: The ULTIMATE Guide to the AIP Diet – Everything you need to know to be successful
Paleo Naan Bread to the Rescue
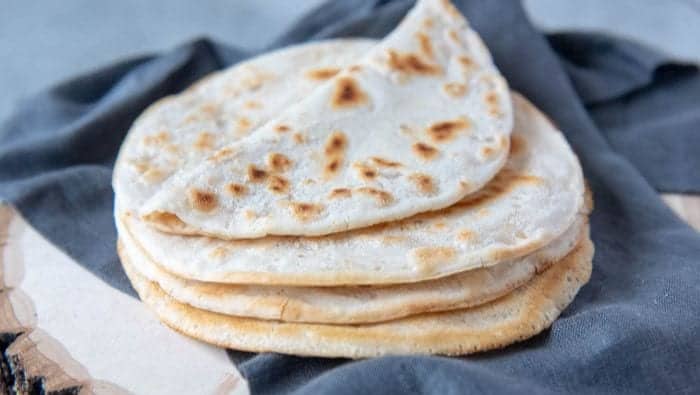
Fast forward a few months later when I was back on regular ole' Paleo (what I typically eat to keep my Hashimoto's and Celiac diseases under control) and I made a regular favorite recipe of ours – My Heart Beet's Paleo Naan.
Now if you've never had Ashley's Paleo Naan, you must do it. Well, if you aren't currently on AIP or can have almond flour that is. It's freakin delicious, makes the BEST side for curries, Indian Butter Chicken, and well, any other Indian dish you can think of. I've even passed this recipe on to non-Paleo Indian friends and they've loved it, plus I've served it to countless non-Paleo friends and they rave over it. So try it.
One evening recently I was making some of this Paleo Naan as a side to an Indian dish and wondered to myself – what if I replaced the almond flour with cassava flour to make it AIP-compliant?
So the next day I set about trying it out. It took a few tries as the ratios weren't exactly the same, but once I hit on the right ration I was PSYCHED!
I tried it again with tigernut flour and again, success. I know some of ya hate cassava flour, so I'm lookin' out for you 🙂
After making a ton of batches to make sure it wasn't a fluke, I decided to share it with you.
AIP Flatbread Video
For a full explanation of the process, watch this video on YouTube.
AIP Flatbread Tips and Tricks
To make this a successful recipe I have these tips for you:
• Use a small non-stick crepe pan if possible, as that will work the best for this. If you have to use a larger non-stick pan that's fine, you may have to cut your flatbread in half once you cook it to make it manageable and you might also have to cook it longer. When I've used a large pan I've almost doubled the time per side.
• The batter should be runny, not super thick. If you need to, add more milk or water to make it this way.
• I state in the recipe to cook it 4 minutes a side at first, and then you may have to adjust the time downwards as your pan gets hotter. This is a good starting point, but if you notice your breads are gummy in the middle or aren't flipping easily, give it more time. They will bubble up at first and then once the bubbles recede you can flip them.
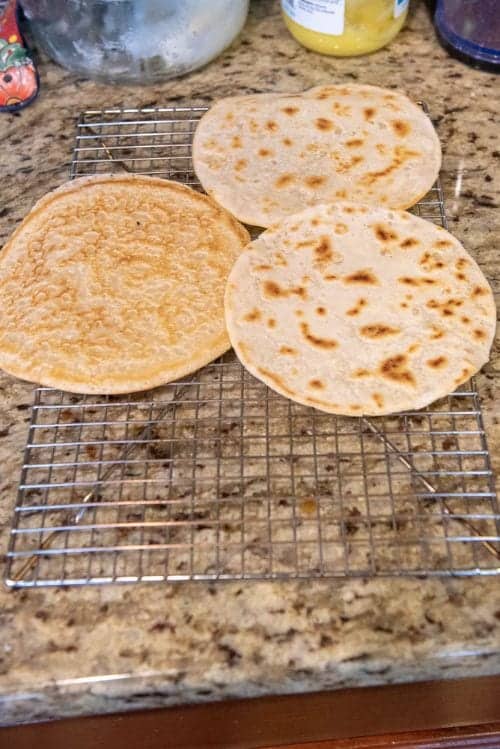
• I like to put these on a baking rack after cooking to let them get air all around them. If you do not have a rack you can put them on a plate, but they tend to get a bit sticky/gummy/wet if you stack them before they are completely cool. So make sure to not stack them.
Using Tigernut Flour Vs Cassava Flour
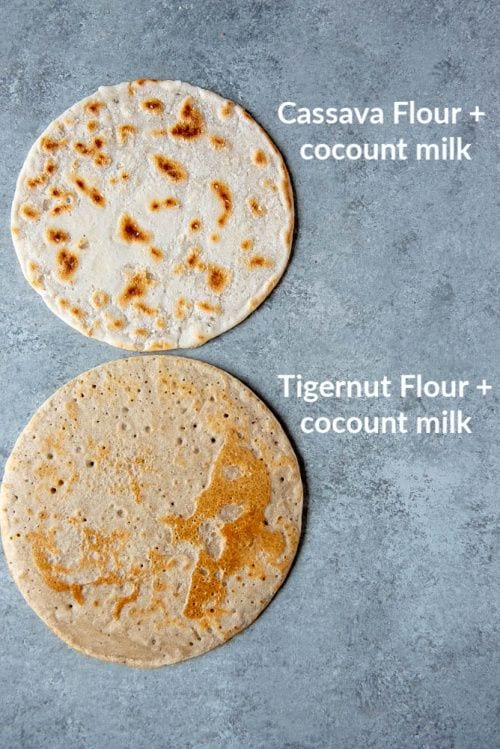
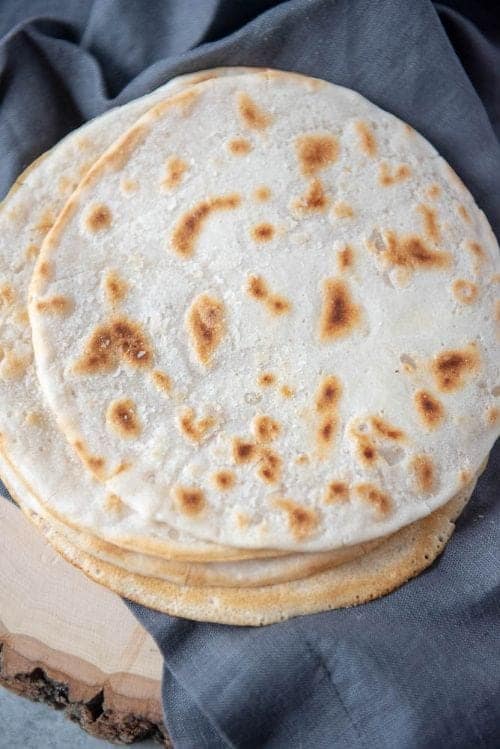
I liked both the cassava flour version and the tigernut flour version, but I did notice that the tigernut flour version was a bit sweeter, darker, and also seemed to be a bit thinner. It seemed like a thick crepe to me.
The cassava flour one felt and tasted a lot more like a traditional pita bread or naan than the tigernut one.
Unfamiliar with either tigernut flour or cassava flour? See AIP Foods You May Not Be Familiar With
It really is up to you what one you'd make, but if you can't decide, I'd go with tigernut for a sweeter application (maybe a jam and tigernut butter wrap?) and with cassava flour for a savory sandwich (like the gyro wraps I'll share next week).
Freezing the AIP Flatbread for Later
One of my favorite parts of this recipe is that they freeze BEAUTIFULLY. This to me is a game changer in itself.
To freeze, simply make up a batch (or 2 or 3) and then put a piece of parchment paper in between each bread. Put into a bag or freezer-safe container and freeze.
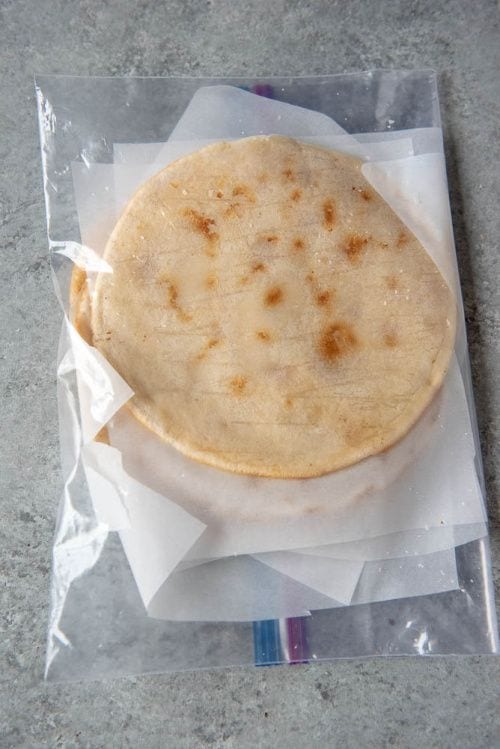
When you want to eat them, remove one or more from the freezer, thaw on the countertop or in the fridge for a few hours, over low heat in a pan or in the oven for a few minutes, or in the microwave for 10-15 seconds. Then use as desired.
I now have a batch of this in my freezer ready to go any time I need to have a sandwich ready to go in minutes, or have some sort of bready side to go with a curry, etc.
Troubleshooting
As soon as I posted this video on YouTube some viewers took to their kitchens to make this bread and helpfully shared some tips that may help you as well:
- This recipe does not do well on stainless steel pans, use a nonstick pan if possible.
- I used Native Forest Simple Coconut Milk with no guar gum but a viewer (Jen G, thanks!) used Golden Star Coconut Milk and had to add some water to make it less thick. She stated she was able to get 7-8 flatbreads out of the recipe as a result.
- A nonstick griddle can work as well (thanks GeekGirlGA!)
- You can put them back over the heat if you discover they aren't done
- I used Anthony's Cassava Flour and Organic Gemini Tigernut Flour – you may have different results with different brands (update: it sounds like Bob's Redmill Cassava flour and Lya Cassava flour lead to gummy breads – so do NOT use these. So interesting how cassava flour can differ so much between brands!)
- IF you do get a gummy flatbread, some people have reported that putting them in the microwave for 10-30 seconds seems to get rid of some of the gumminess. Again, I think this is based on the cassava flour you use, but this may help!
You May Need
These are the things I found helpful for making this recipe:

8-inch non-stick pan (this is the frying pan I used but you can also use a crepe pan)

A baking cooling rack for letting the air flow around the breads as they cool

I personally like Anthony's Cassava Flour the best, but use whatever brand you're loyal to

I like the Native Forest Simple brand of guar gum-free coconut milk, but there are several others. You can also make homemade milk.
Use this Flatbread with the AIP Gyro Wrap
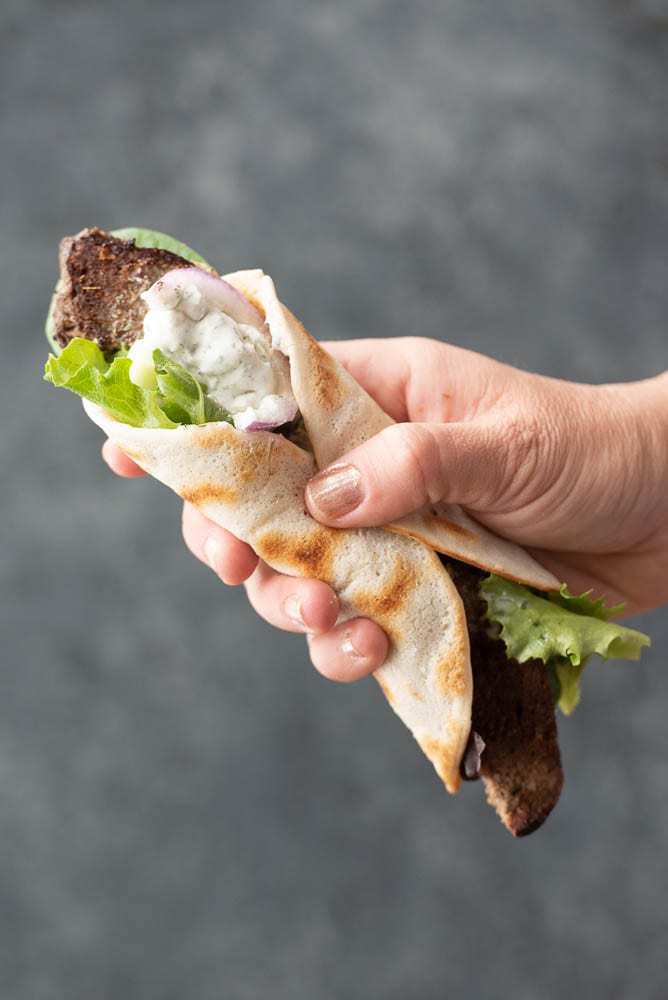
One of my favorite ways to use this flatbread is with my AIP Gyro Wraps!
The meat is actually pretty easy to make, and it freezes well, so you can have a genuine-tasting gyro sandwich in minutes from frozen!
AIP Flatbread Recipe
I hope you enjoy these flatbreads! If you make them I'd love to hear how it turned out! Either comment below or share a pic on Instagram and tag me @thrivingautoimmune!
AIP Flatbread Recipe
Ingredients
- 1 13.5 oz can Coconut Milk (OR use 1.5 cups homemade Coconut Milk or Tigernut Milk per 4 tortillas)
- 3/4 cup Cassava Flour (OR Tigernut Flour)
- 3/4 cup Tapioca Flour (OR Arrowroot Powder)
- 1 Pinch Sea Salt
Instructions
- Preheat a small nonstick pan over medium heat.
- Mix all of the ingredients into a bowl. If using tigernut flour, really make sure all of the lumps are broken apart (it really likes to clump). Make sure the batter is somewhat runny, you don't want it really thick. Add water or more milk if necessary.
- Pour enough batter into the pan to cover the bottom of the pan + about 1/8-1/4 inch thick. These are a tad bit thicker than crepes.
- Cook for 3-4 minutes per side, adjusting the time up above 4 min if the batter doesn't look completely dry when you flip it, and adjust the time down if you get too many brown or black spots. Black or brown spots are totally fine, just don't want to burn these!
- You'll notice that the cooking time will get less as you continue to cook the breads, since the pan gets hotter. If the bread is gummy inside it needs to be cooked longer. (This all sounds kind of fussy and complicated but trust me, you'll figure it out after a few – it's just different pans, cassava flours, coconut milks, amount of heat, etc all makes it a little bit different for everyone).


Thank you so so much for this recipe. I went back to AIP after a hiatus (last 2014, it was indeed the dark ages of AIP) and this recipe is an absolute life saver, making life so much easier and way more delicious. To anyone who’s thinking of trying it – do, you won’t regret it!
Thank you so much for creating this recipe! I just made these with tigernut flour, tapioca starch and just water instead of coconut milk and they came out perfect. They are delicious and so easy to make! Thanks again! (For the dutch readers: I used tigernut flour and tapioca flour from Holland & Barrett)
Mine will not cook in the middle very well, but, I actually don’t mind the gumminess.. I sprinkled stevia and cinnamon on one.. so yummy
I had much the same issue with gumminess and sticking to the pan. However, I found that putting them on parchment paper in the oven worked like magic. They cooked just like a pita bread. I used pamela’s tigernut flour and coconut milk without guar and arrowroot. I have found a gumminess issue with everything I make with arrowroot, so use in small amounts. Thank you for sharing!
What are the brands used for each of the ingredients?
It’s all listed up in the post – under “You May Need” and the Troubleshooting section as well
I just tried these and mine turned out gummy as well. I used Anthony’s brand and room temp canned coconut milk without gum. I did have to add some water as it was a bit thick. The first side is gummy and the second side is a great texture that looks like a tortilla. I’ll likely use them as tortillas later. I figure once all of the ingredients are in the taco, you won’t be able to tell that they are a bit gummy.
Hmm… I still haven’t figured out the reason some people find them to be gummy and some people get perfectly cooked ones. One day I will know this and share it with everyone!
That’s what I was looking for. I used a stainless steel pan with olive oil. Worked very well.
Thanks for sharing what worked for you on the stainless steel pan!
I’ve tried this and it came out VERY gummy and I could not flip it over as it was stuck to the pan.
Do you have any advice?
If you used the brands I mentioned, then try microwaving it for 30 seconds-1 minute.
Thank you Michele!!! This was my first AIP bread experience. I used the Anthony’s Cassava flour, an un-named Tapioca flour (I had put it into a glass container and can’t remember the brand), and Native Forest Coconut Milk Simple, on my cast iron round griddle, and they turned out beautifully. But I turned them over one more time as I noticed they were trying to puff like my homemade corn tortillas did back in the day, so I treated them as such. It worked out great. After turning them over that last time, you gently prod them, first in the center and then prodding in a circular direction around the bread, with a folded paper towel or kitchen towel and it causes them to puff like a pita bread does. This incorporates steam into the center which helps to cook them through. I was taught this technique from a friend who grew up in the jungles in Mexico. I found a YouTube video (https://youtu.be/qT7E1XcGWAc) that shows the technique. If you start at 2:50 you see her prodding with her bare fingers. My friend did it that way as well, but I’m a wus, so I use a paper towel.
Thank you so much for this recipe!!! I have been missing bread for so long now! Cassava is new to me, as is the Tiger Nut Flour (which I haven’t tried yet). When I went gluten free several years ago, all my bread turned out a disaster, so I gave up on baking entirely. This was a huge departure from where I was prior when I used to grind my own wheat and bake everything from scratch. I am encouraged to find I can at least make a naan/tortilla for wraps (or just plain eating) that turns out soft and supple like before. I am grateful for all your hard work and effort and sharing to help make our lives better.
Thanks so much for sharing your experience and what worked for you! Glad you liked them 🙂
Thank you so much for the recipe, it turned out great for me. The first 2 wraps that I cooked ended up in very gummy balls, and then as I changed my technique for pouring and cooking I ended up with all-over crispy flatbreads or nicely rollable wraps. I only made one batch of batter, so the cooking technique is more important than the ingredients. For reference, I used Aldi’s full cream coconut cream (75% coconut extract, 25% water), a tapioca starch from the Asian section of the supermarket, and Three Spades Cassava Flour. All ingredients purchased in Australia. I used some of the coconut cream in the tin for another recipe, and replaced the used amount with water. Here is everything else that I did to get crispy or rollable wraps (only difference between crispy and flexible is time):
400ml tin coconut milk at room temperature and completely liquid (removed maybe ¼ of a cup from the tin for another recipe, and topped up with water)
3/4 cup Cassava Flour
3/4 cup Tapioca Flour
Pinch of sea salt
1. Mix in kitchen aid with beater attachment, makes a very runny batter.
2. Heat small enamelled frying pan (8.5”) over medium-low heat (setting 3 out of 6 on my electric stove).
3. Tip olive oil into the pan and swirl it, then remove by wiping with a paper towel (oil is evenly distributed but can’t be seen).
4. Drizzle ¼ of a cup of batter into the hot pan, starting in the middle and circling out slowly.
5. Don’t let the batter reach all the way to the edges of the pan.
6. The wrap is ready to flip when the pan is shaken and the wrap slides loose.
7. Flip like a chef in the movies.
8. Cook on second side for a couple of minutes.
9. Remove from pan onto a cooling rack (do not stack the wraps until cold)
10. Wrap may be rollable, crispy around the edges and rollable in the middle, or all-over crispy.
Hope this is helpful for someone else. If your first one or two wraps don’t work, don’t just blame the ingredients. I made 2 terrible wraps (gummy and impossible to use), 2 flexible wraps and 5 crispy wraps (my preferred texture) from the SAME batch of batter.
Forgot to say mine don’t look like yours, and appear to be a bit thinner, however my husband (who hates coconut and eats a SAD diet) said the crispy ones taste so normal and good that he would happily eat them.
Thank you Michelle. I hate the taste of coconut and was searching the comments to see if someone had an alternate for that. You can’t taste the coconut then?
Thanks SO much for your insight and tips – I’m sure this will help others a lot!
I was so exited to make them … used Anthony’s cassava flour, Anthony’s arrowroot flour and Native Forest coconut milk… Came out super gooey and gross inside, like the a raw batter inside although I cooked for so long! 😢
Ugh, I’m sorry! I really have no idea why they do that! I still haven’t really had any come out gooey unless I use tigernut flour. I’m seriously at a loss at how so many people have zero issues and then others do have issues….
Thank you for the recipe. I cannot believe there isn’t gluten in these because they are so flexible. I used Bobs Red Mill cassava flour and TJs canned coconut milk. However, I did batch them for frig and then nuked them for a meal. Used them for AIP gyros. I’m gonna use them for everything. So easy to make. Thank you again.
Isn’t it weird how flexible they are? I’m happy you liked them! ❤️